tensorQTL :最高效的QTL 分析工具
众所周知,xQTL 分析需要测试转录组中每个基因与一组变异的关联。通常,对于顺式 xQTL 分析,一个基因或其他的基因型数据可能有数千个变异需要测试。反式 xQTL 分析则更复杂, MatrixeQTL 为 eQTL 识别创建计算负担较小的分析。与其他 QTL 分析工具相比,Matrix eQTL 的分析速度要快几个数量级,这要归功于特定的预处理以及对系统计算困难方面使用大型矩阵运算。但是为了比较具有不同 LD 结构和不同数量测试变异的基因,xQTL 的统计测试需要置换检验, 因此,即使使用 MatrixQTL,它的计算量也很大。为了克服置换检验的计算负担, FastQTL提出了一种近似模拟方案,该方案对大规模转录组范围的分析有效, 即 Geuvadis & GTEx, 这几乎是CPU的极限了,但是没有用到GPU,对于这种密集型计算,GPU的速度是CPU的上百倍, 而对应的软件就是tensorQTL
不知道xqtl的见这些文章用R包——MatrixEQTL做eQTL分析sQTL分析介绍
01
—
tensorQTL分析的输入文件
Phenotype
表型: 代表每个个体(基因 x 个体)基因表达水平的矩阵
Phenotype
基因型: 代表每个变体和个体的基因型剂量(效应等位基因)的矩阵(plink 格式)
Covariate
协变量: 表示每个个体的协变量值值的矩阵(协变量 x 个体)
计算方式见下文
02
—
下载安装方法和使用方法
下载:
软件github:https://github.com/broadinstitute/tensorqtl
pip install pip@git+https://github.com/broadinstitute/tensorqtl.git
同时需要一个plink2(相信做相关分析的应该都知道)
如果直接安装失败,可以使用github下载安装
git clone git@github.com:broadinstitute/tensorqtl.gitcd tensorqtl# install into a new virtual environment and loadmamba env create -f install/tensorqtl_env.ymlconda activate tensorqtl
总体参考:
https://github.com/broadinstitute/tensorqtl?tab=readme-ov-file
有两种用法, 一种是命令行工具调用
python3 -m tensorqtl --helpusage: __main__.py [-h] [--mode {cis,cis_nominal,cis_independent,cis_susie,trans,trans_susie}] [--covariates COVARIATES] [--paired_covariate PAIRED_COVARIATE] [--permutations PERMUTATIONS]                   [--interaction INTERACTION] [--cis_output CIS_OUTPUT] [--phenotype_groups PHENOTYPE_GROUPS] [--window WINDOW] [--pval_threshold PVAL_THRESHOLD] [--logp]                   [--maf_threshold MAF_THRESHOLD] [--maf_threshold_interaction MAF_THRESHOLD_INTERACTION] [--dosages] [--return_dense] [--return_r2] [--best_only] [--output_text]                   [--batch_size BATCH_SIZE] [--chunk_size CHUNK_SIZE] [--susie_loci SUSIE_LOCI] [--disable_beta_approx] [--warn_monomorphic] [--max_effects MAX_EFFECTS] [--fdr FDR]                   [--qvalue_lambda QVALUE_LAMBDA] [--seed SEED] [-o OUTPUT_DIR]                   genotype_path phenotypes prefix
tensorQTL: GPU-based QTL mapper
一种是py模块调用,具体见
https://github.com/broadinstitute/tensorqtl/blob/master/example/tensorqtl_examples.ipynb
import pandas as pdimport torchimport tensorqtlfrom tensorqtl import pgen, cis, trans, postdevice = torch.device("cuda" if torch.cuda.is_available() else "cpu")phenotype_df, phenotype_pos_df = tensorqtl.read_phenotype_bed(expression_bed)covariates_df = pd.read_csv(covariates_file, sep='\t', index_col=0).T
# PLINK reader for genotypespgr = pgen.PgenReader(plink_prefix_path)genotype_df = pgr.load_genotypes()variant_df = pgr.variant_df
阿斯蒂芬
03
—
详细用法介绍
如前所述,tensorQTL是做xqtl 的,这里介绍命令行用法,分析是怎么做的
计算顺式 QTL 分析中的 nomial p-value (名义 p 值)
这是最常见的xQTL 的cis结果的分析,使用的mode为cis_nominal
命令为
python3 -m tensorqtl \ Genotype \ # Genotype文件,需要plink转化 Phenotype.bed.gz \ # Phenotype文件,一般要标准化 cis_nominal \ # 输出文件目录 --covariates covariates.txt \ # 协变量文件 --window 10000 \ --mode cis_nominal
得到的结果为所有正在测试的变异/基因对, 按照染色体分别输出,这个非常好,因为文件大到不可想象,如果不拆分,处理他的速度和资源开销会很夸张,结果类似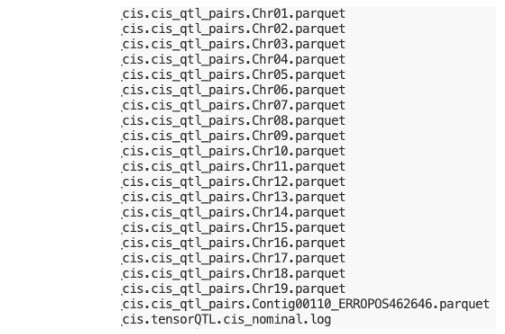
输出文件采用 parquet 格式,这是一种二进制格式,它提供了更好的 I/O 性能, 但是没法直接读取
我提供一个强性能的py代码用于转换,当然你们可以用pandas处理,只是稍微慢一点(这一步不涉及过滤,你们可以在得到结果以后过滤,也可以稍微修改代码过滤)#!/usr/bin/env python3
import pyarrow.parquet as pq
import pyarrow.csv as pc
import pyarrow as pa
import sys
if len(sys.argv) != 2:
print("Usage: python parquet2txt.py <input_parquet_file>")
sys.exit(1)
file_name = sys.argv[1]
output_file = f"{file_name}.txt"
# Read the parquet file object
parquet_file = pq.ParquetFile(file_name)
# Open the output file (binary mode)
with open(output_file, "wb") as f:
# Write header (avoid pyarrow auto-quotes)
header = "\t".join(parquet_file.schema.names) + "\n"
f.write(header.encode("utf-8"))
# Batch reads and writes
for batch in parquet_file.iter_batches(batch_size=10_000_000):
table = pa.Table.from_batches([batch])
pc.write_csv(
table,
f,
write_options=pc.WriteOptions(
delimiter="\t",
include_header=False,
quoting_style="none"
)
)
- 发表于 2025-09-03 15:22
- 阅读 ( 2534 )
- 分类:GWAS
